

How to Create Your Own AI Tools: A Comprehensive Guide with Knowledgio
Dec 21, 2023
Hello there! Today, we're going to embark on a journey to create our very own AI tool using Knowledgio. This guide is specially designed for startup founders and small businesses looking to improve their processes with the power of AI. We're going to keep it simple and easy to understand, so even if you're new to this, don't worry! We've got your back.
Step 1: Understanding Knowledgio
Before we dive into creating our AI tool, let's take a moment to understand what Knowledgio is. In simple terms, it's an AI wrapper that allows you to define AI runners. These runners are tools that can execute AI tasks or prompts, helping you save precious time that would otherwise be spent executing prompts one by one.
To learn more about how Knowledgio can boost your AI productivity, you can check out our comprehensive guide.
Step 2: Signing Up and Exploring Your Space
Signing up on Knowledgio is a breeze. Once you're signed up, you'll find yourself in your space. This is where the magic happens! You can have multiple spaces and even create new ones. Each space allows you to invite team members and share access. This real-time nature of Knowledgio ensures that any changes made by team members are immediately visible.
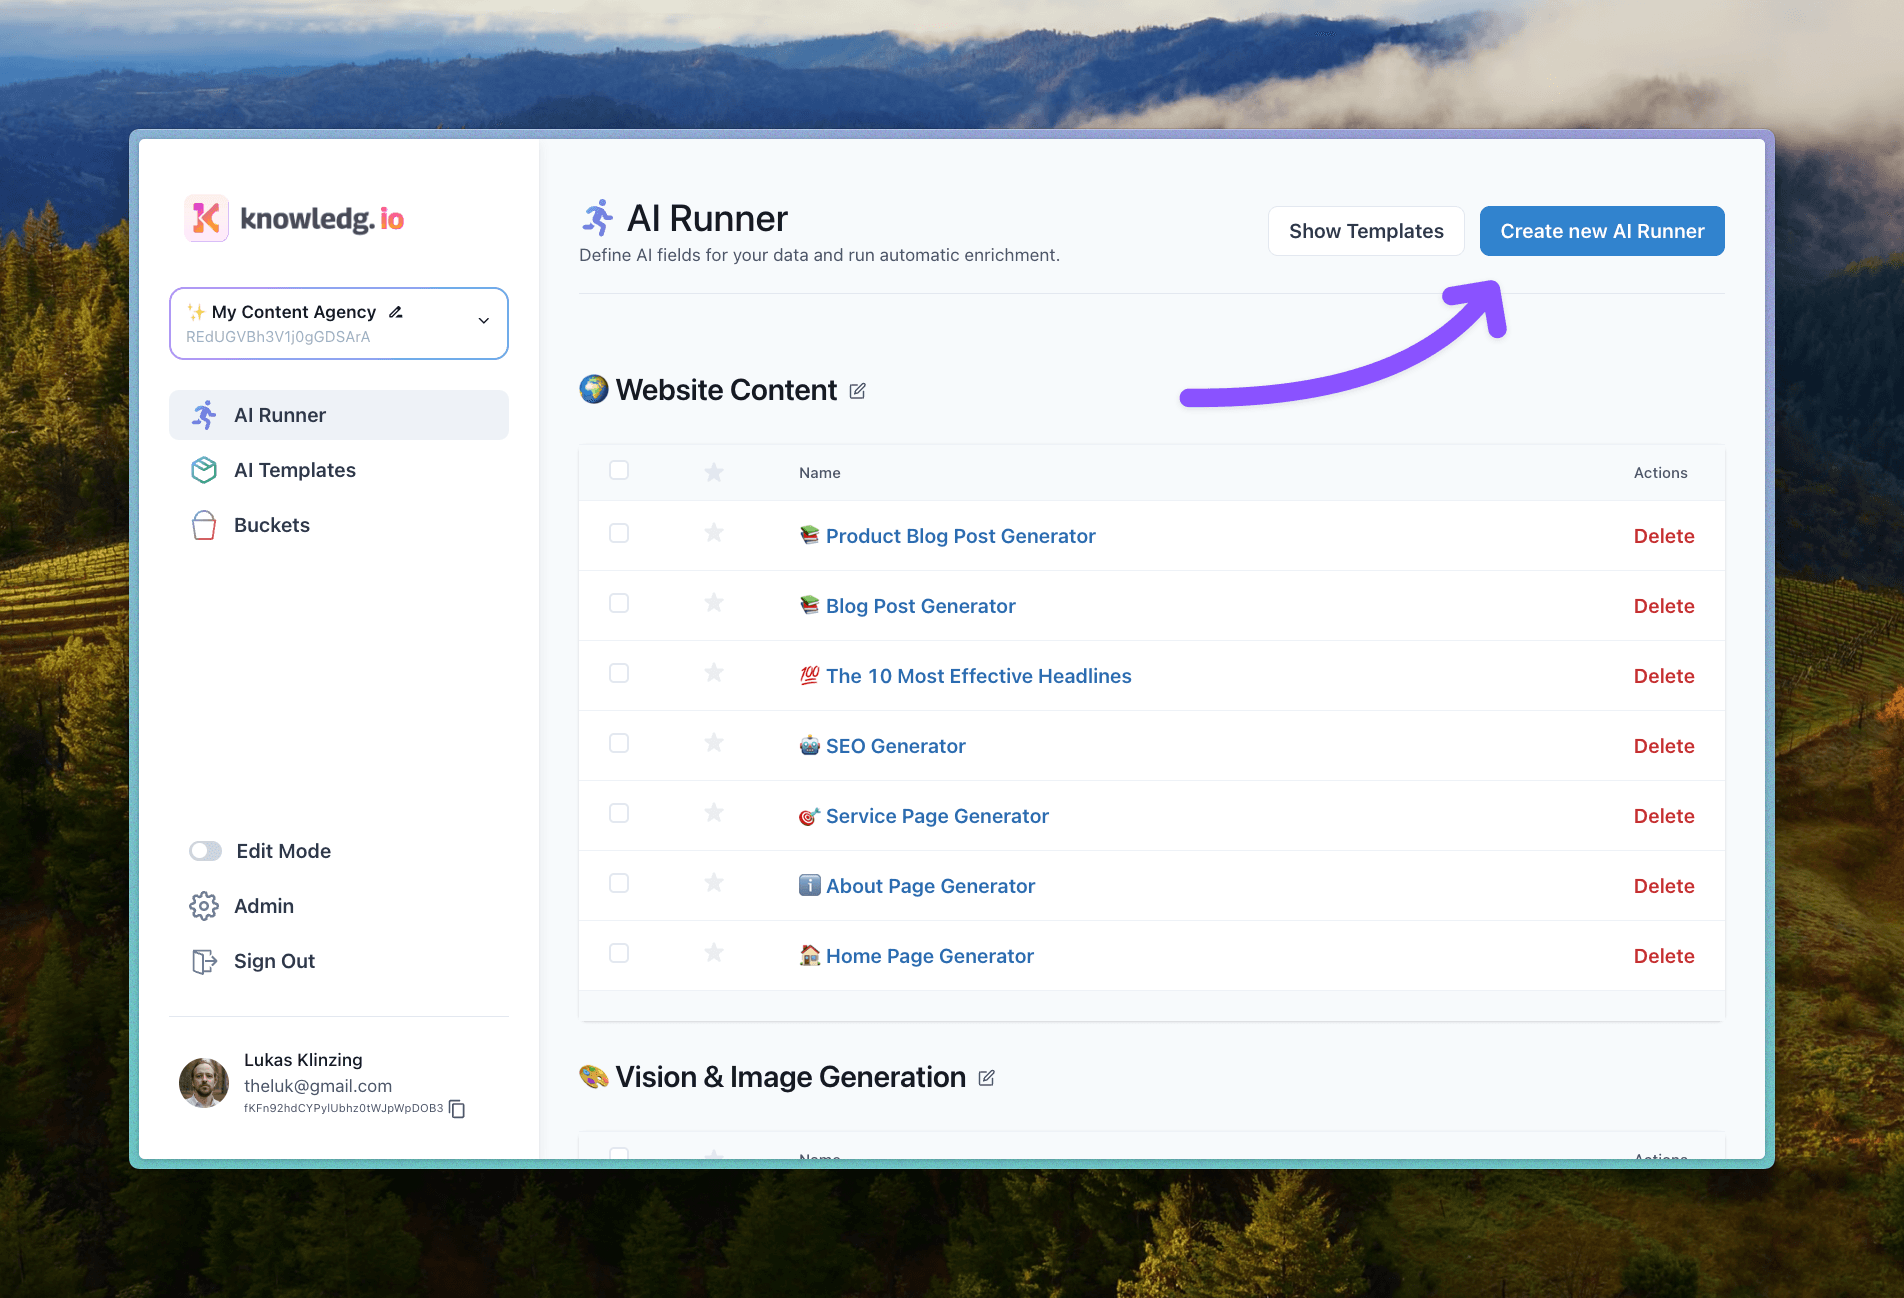
Step 3: Creating a New AI Runner
Now, let's move on to creating our AI tool. For this guide, we're going to create an SEO AI Tool that generates a title and a meta description.
To start, click on "Create New AI Runner" in the AI runner list. This will open up a new window where you can define the prompts that will run. Each AI runner can execute multiple prompts based on a set of input fields.
For our SEO AI Tool, we'll need to define a target audience persona, a topic, and a post type. These input fields can be edited by selecting the three dots and choosing "Edit Parameters". Here, you can specify the type of input (like text, select, or document from a bucket), and even set default values, placeholders, and mark fields as required.

This flexibility allows you to customize your AI runner to match your specific needs. To learn more about this process, you can check out our guide on creating ready-to-send scripts for creators.
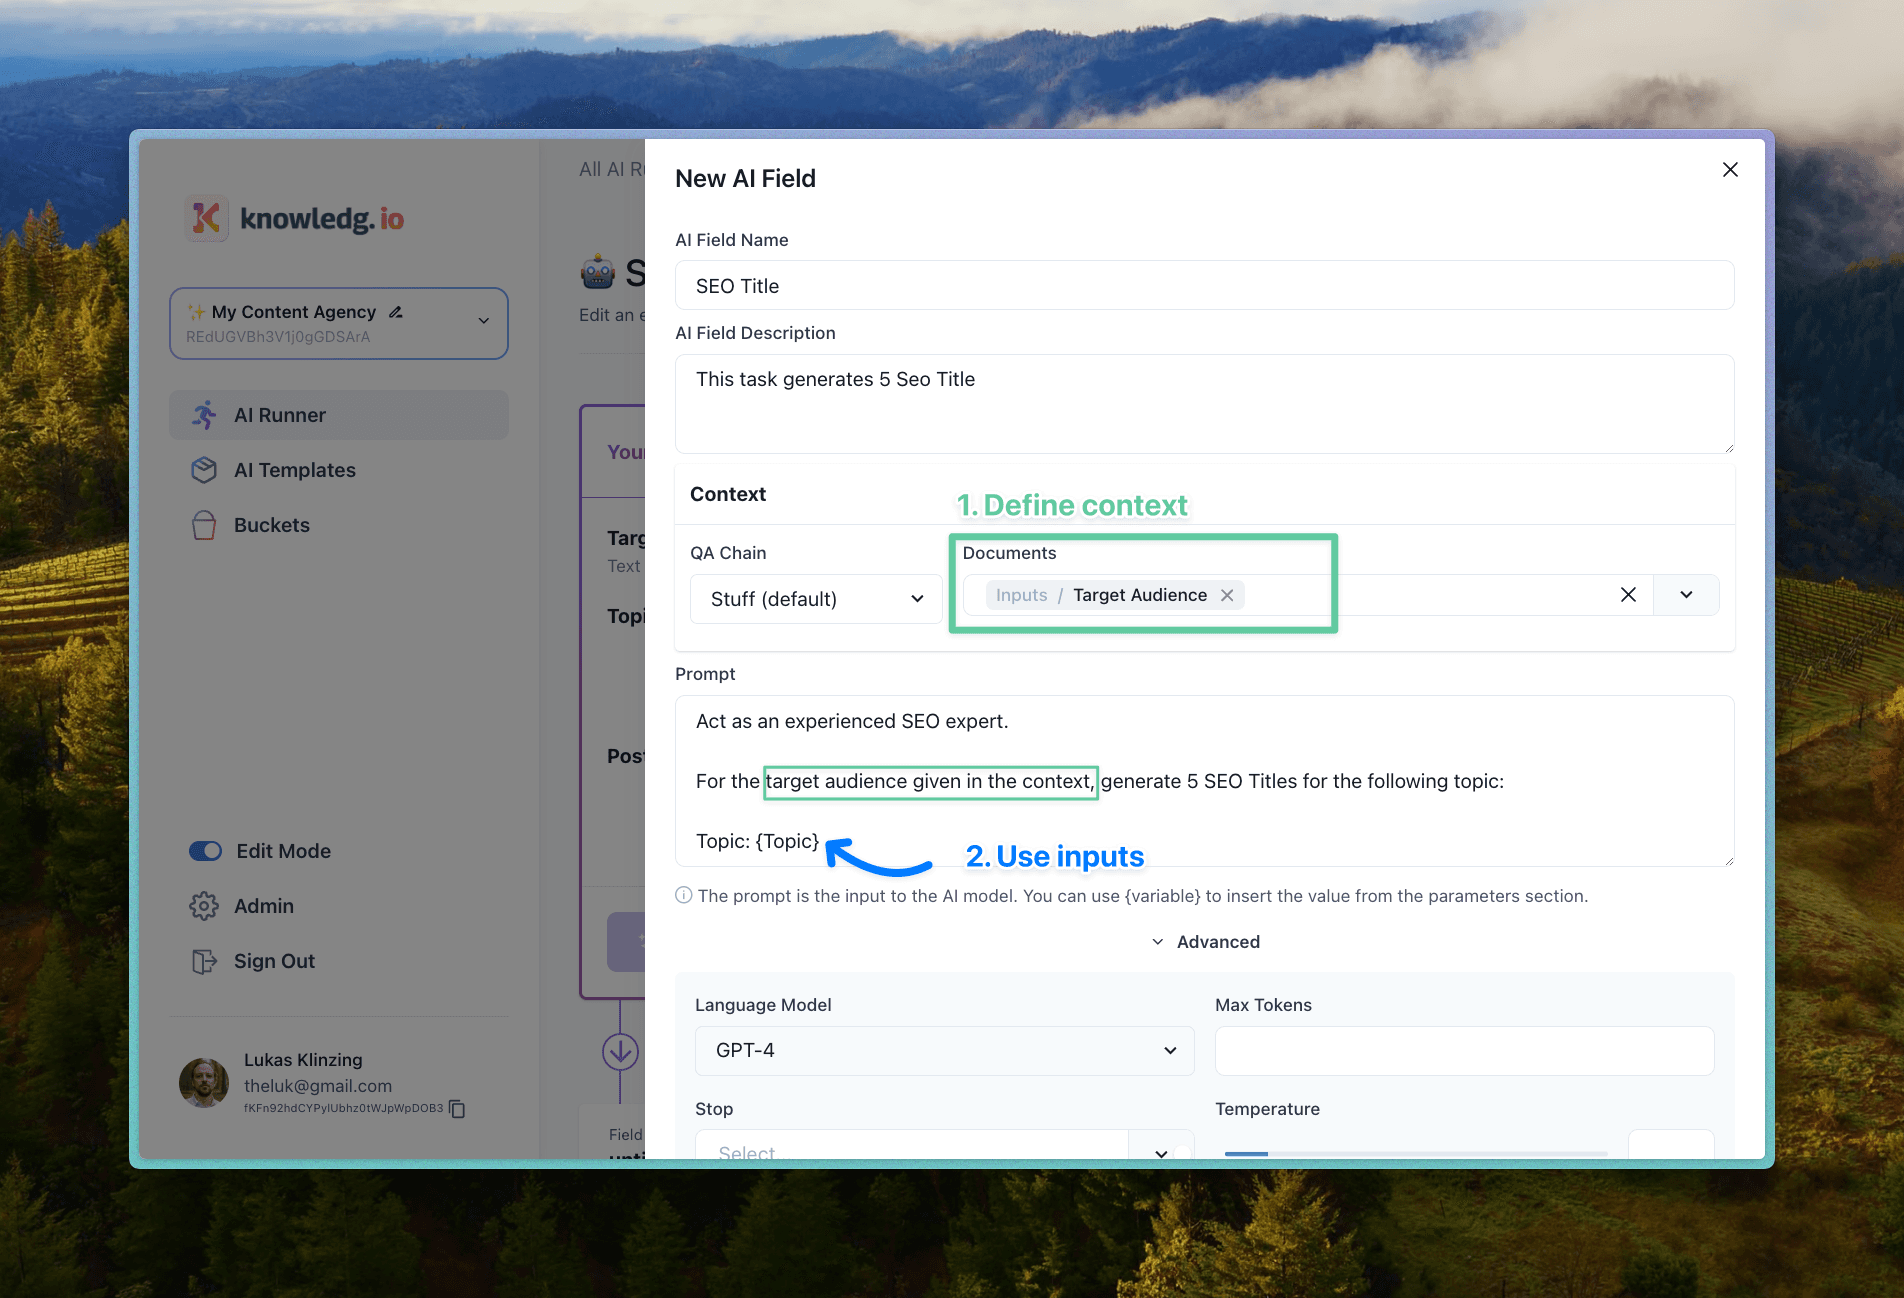
Step 4: Defining Prompts
Now that we've defined our inputs, let's move on to defining the prompts. These are the actual tasks that our AI runner will execute based on the inputs we've set.
For our SEO AI Tool, we'll need to define a prompt for generating a title and another for generating a meta description. Each prompt needs a name, description, the actual prompt, and context. The context allows you to reference inputs from parameters or documents in buckets, which can be very useful for including knowledge from various sources in your prompts.
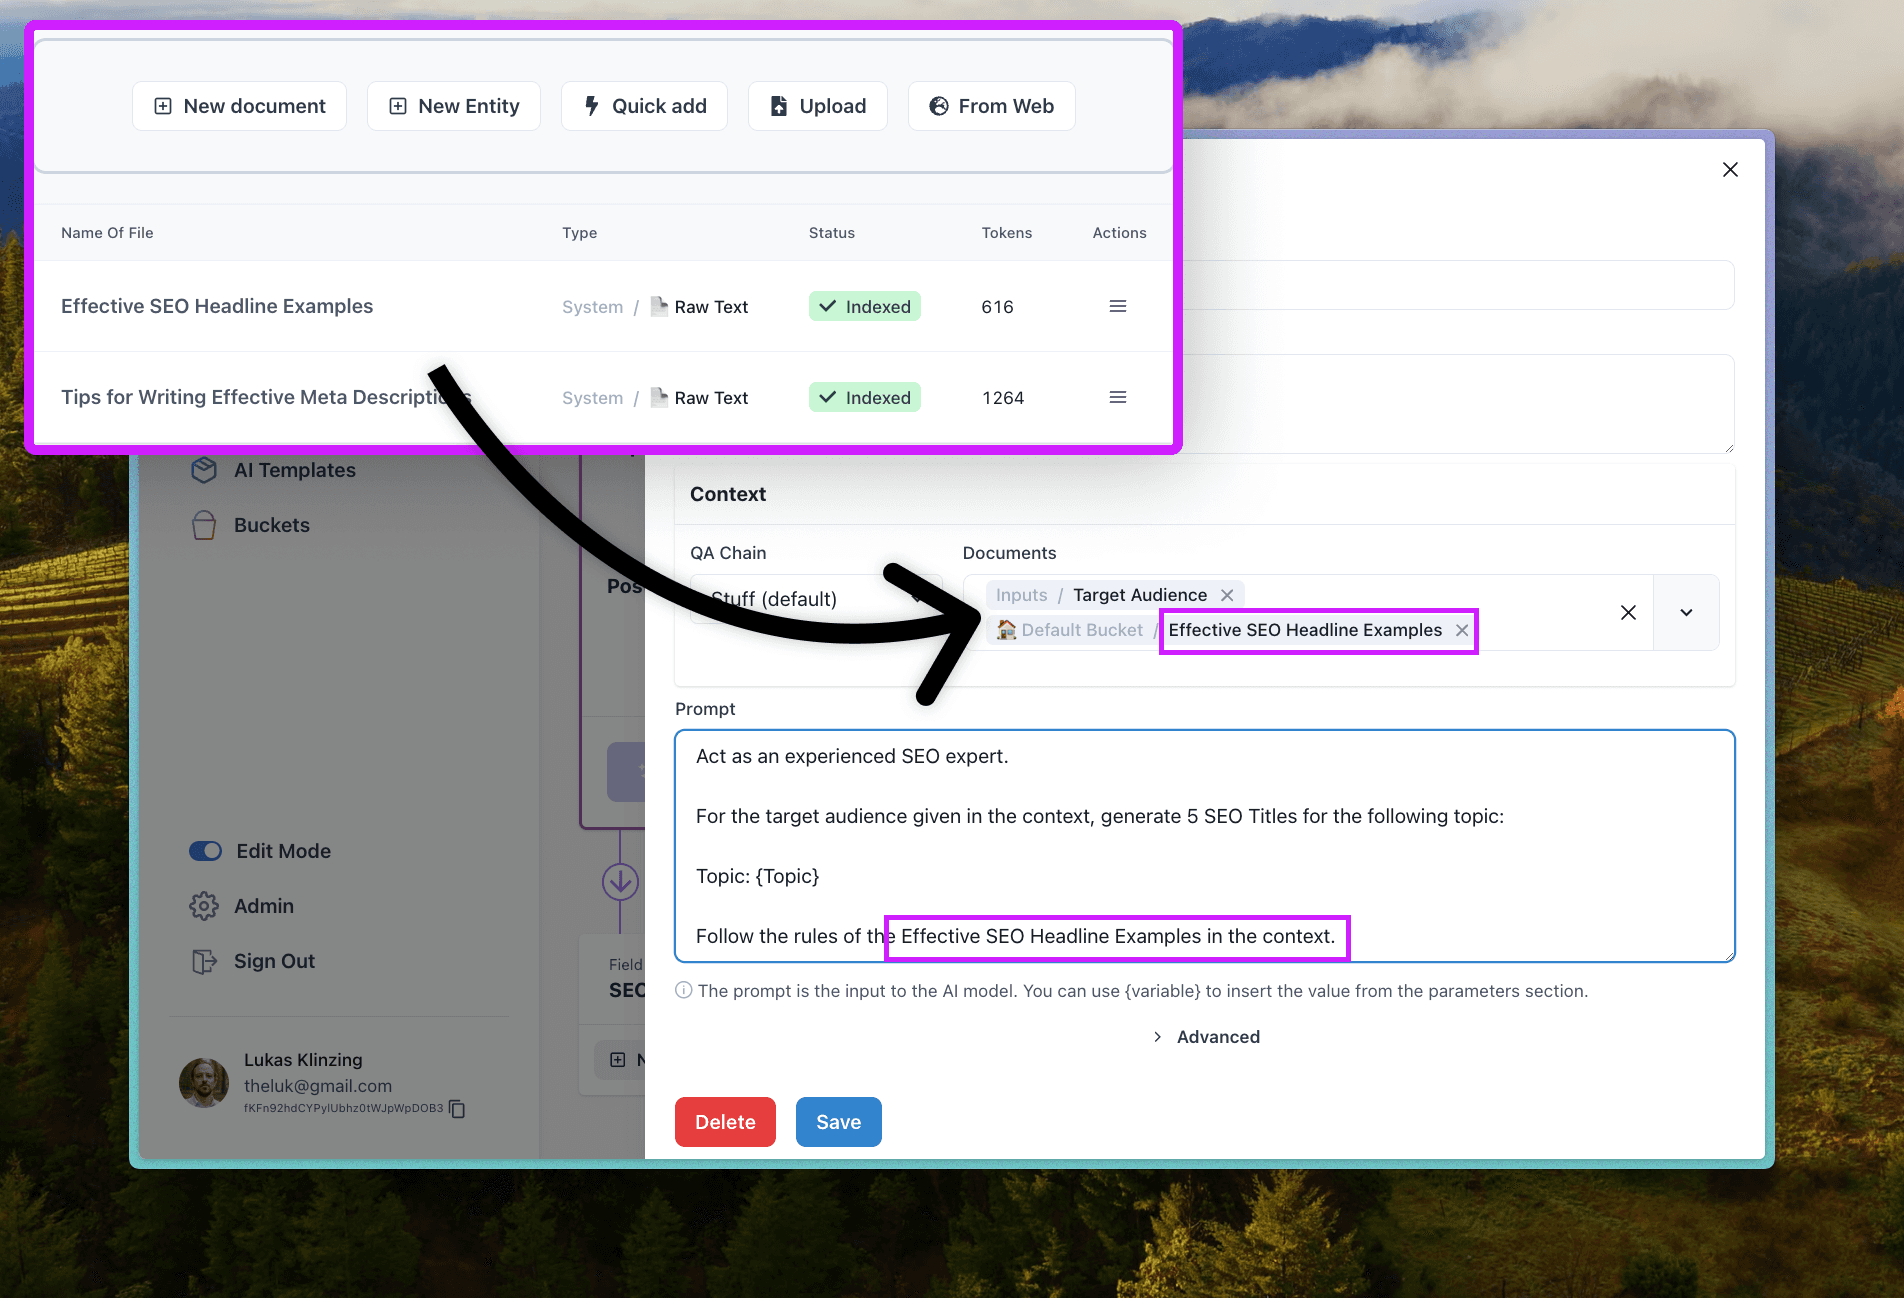
Step 5: Leveraging Knowledge from Buckets
One of the unique features of Knowledgio is the concept of buckets. Buckets allow you to store and organize information, which can then be referenced in your prompts. For our SEO AI Tool, we could have a bucket filled with effective SEO practices and tips, which the AI can draw from when generating titles and meta descriptions.
To learn more about how buckets can enhance your AI tool, check out our guide on using buckets to boost your marketing strategy.
Step 6: Generating Results and Sharing Your Workspace
Now that we've set everything up, it's time to generate some results! By selecting a target persona, topic, and post type, we can hit the generate button. Our SEO AI Tool will then execute the prompts and generate the desired outputs.
Once you're happy with your AI tool, you can share your workspace with others. This way, your team members or other users can benefit from the predefined knowledge and AI runners you've created.
To learn more about sharing workspaces, you can read our guide on creating a landing page for your workspace.
And there you have it! You've just created your own AI tool using Knowledgio. Remember, this is just the beginning. You can create as many AI tools as you need, each tailored to your specific needs. So go ahead, start exploring, and see how Knowledgio can revolutionize the way you work with AI.
Happy building!
As an AI power user, you will love knowledg.io
It's time to change, how we leverage AI to scale our workflows
